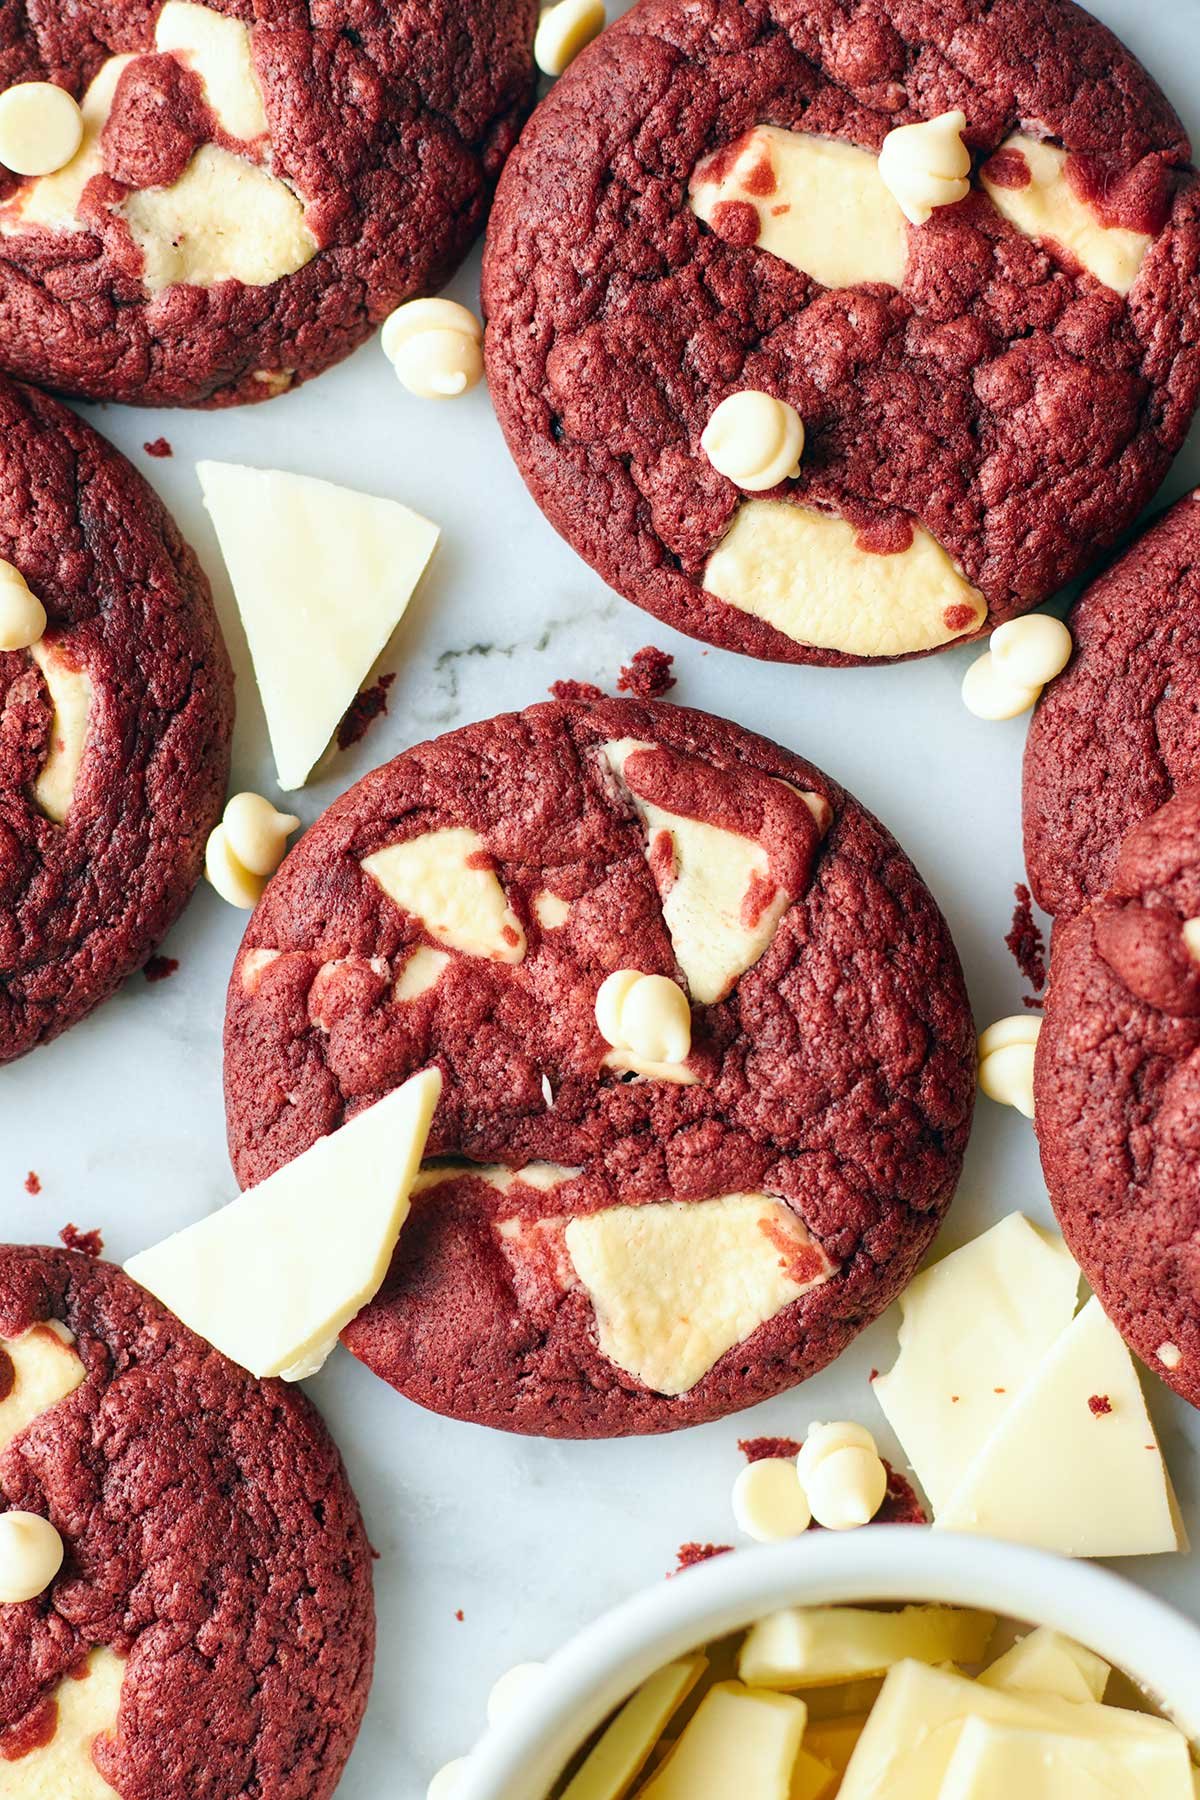
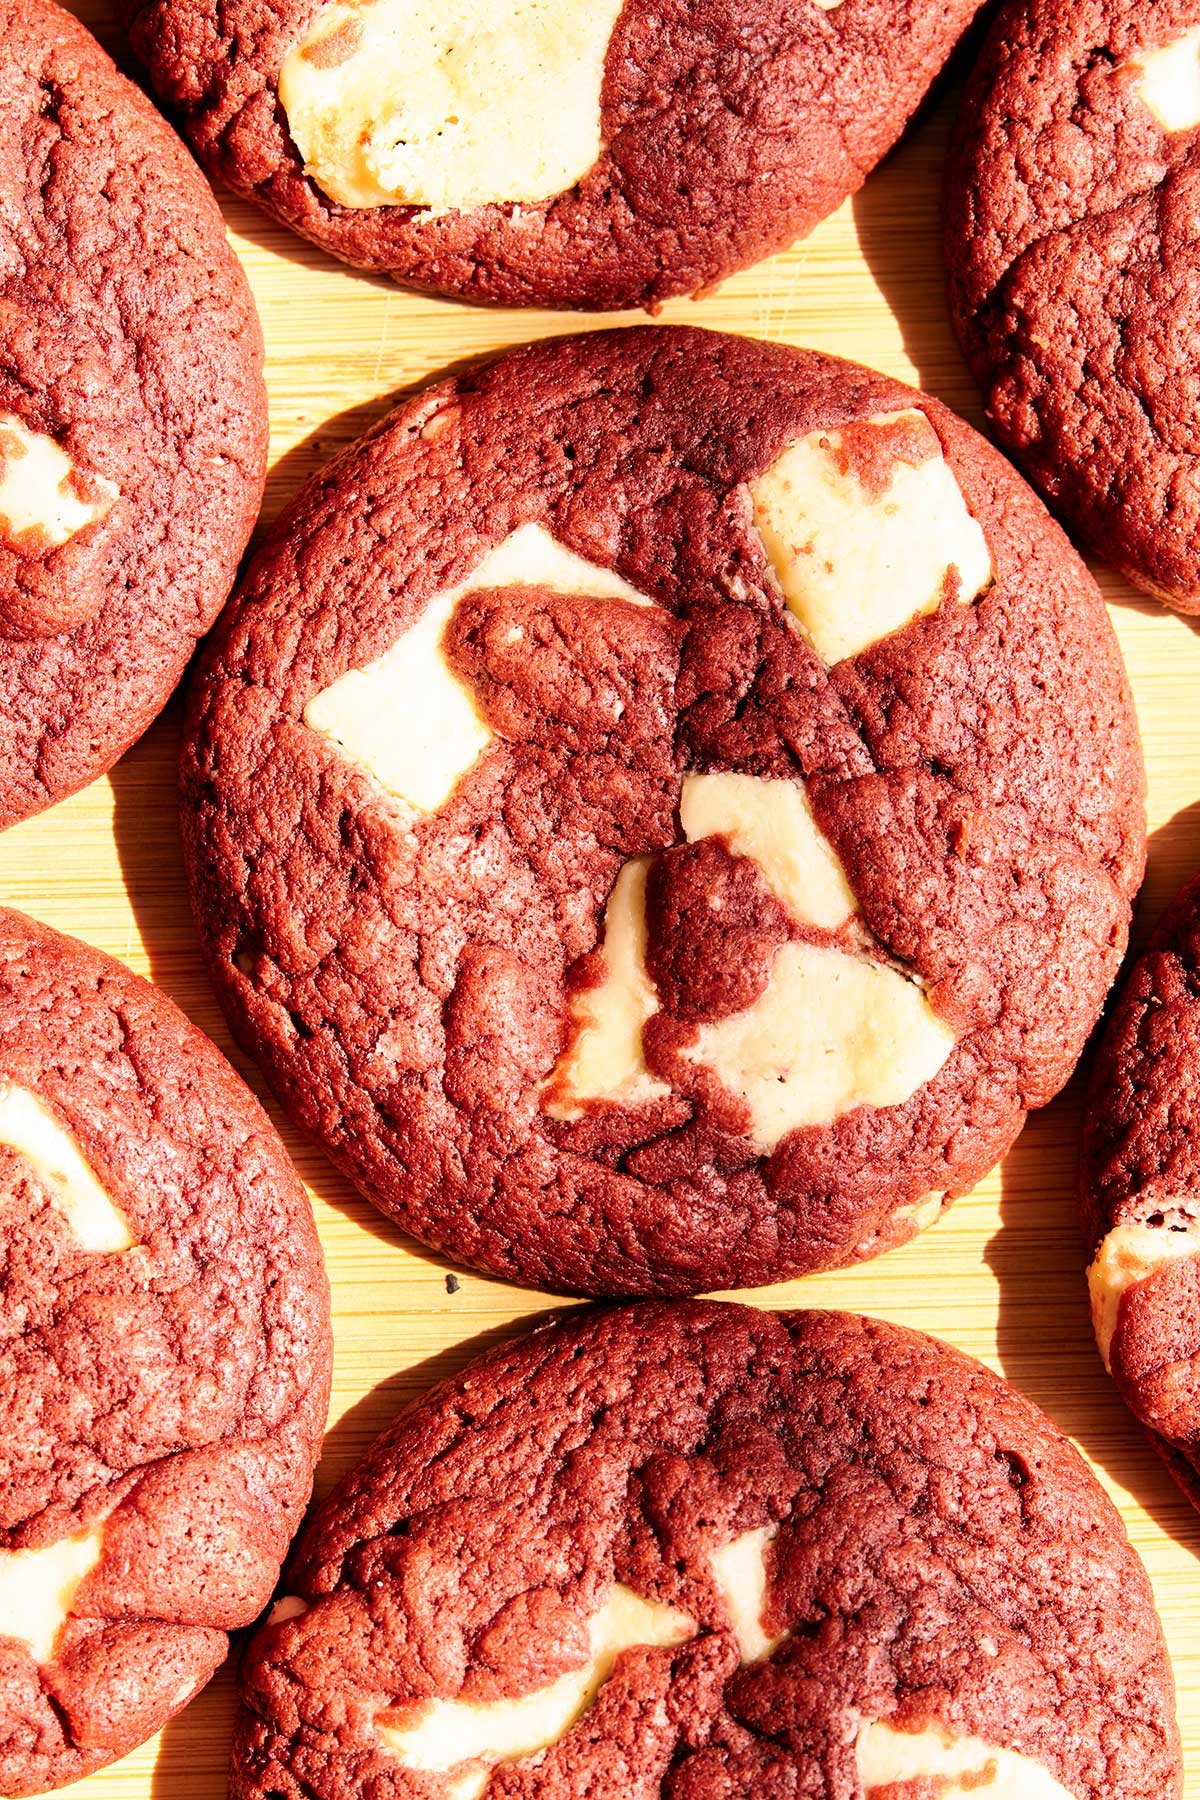
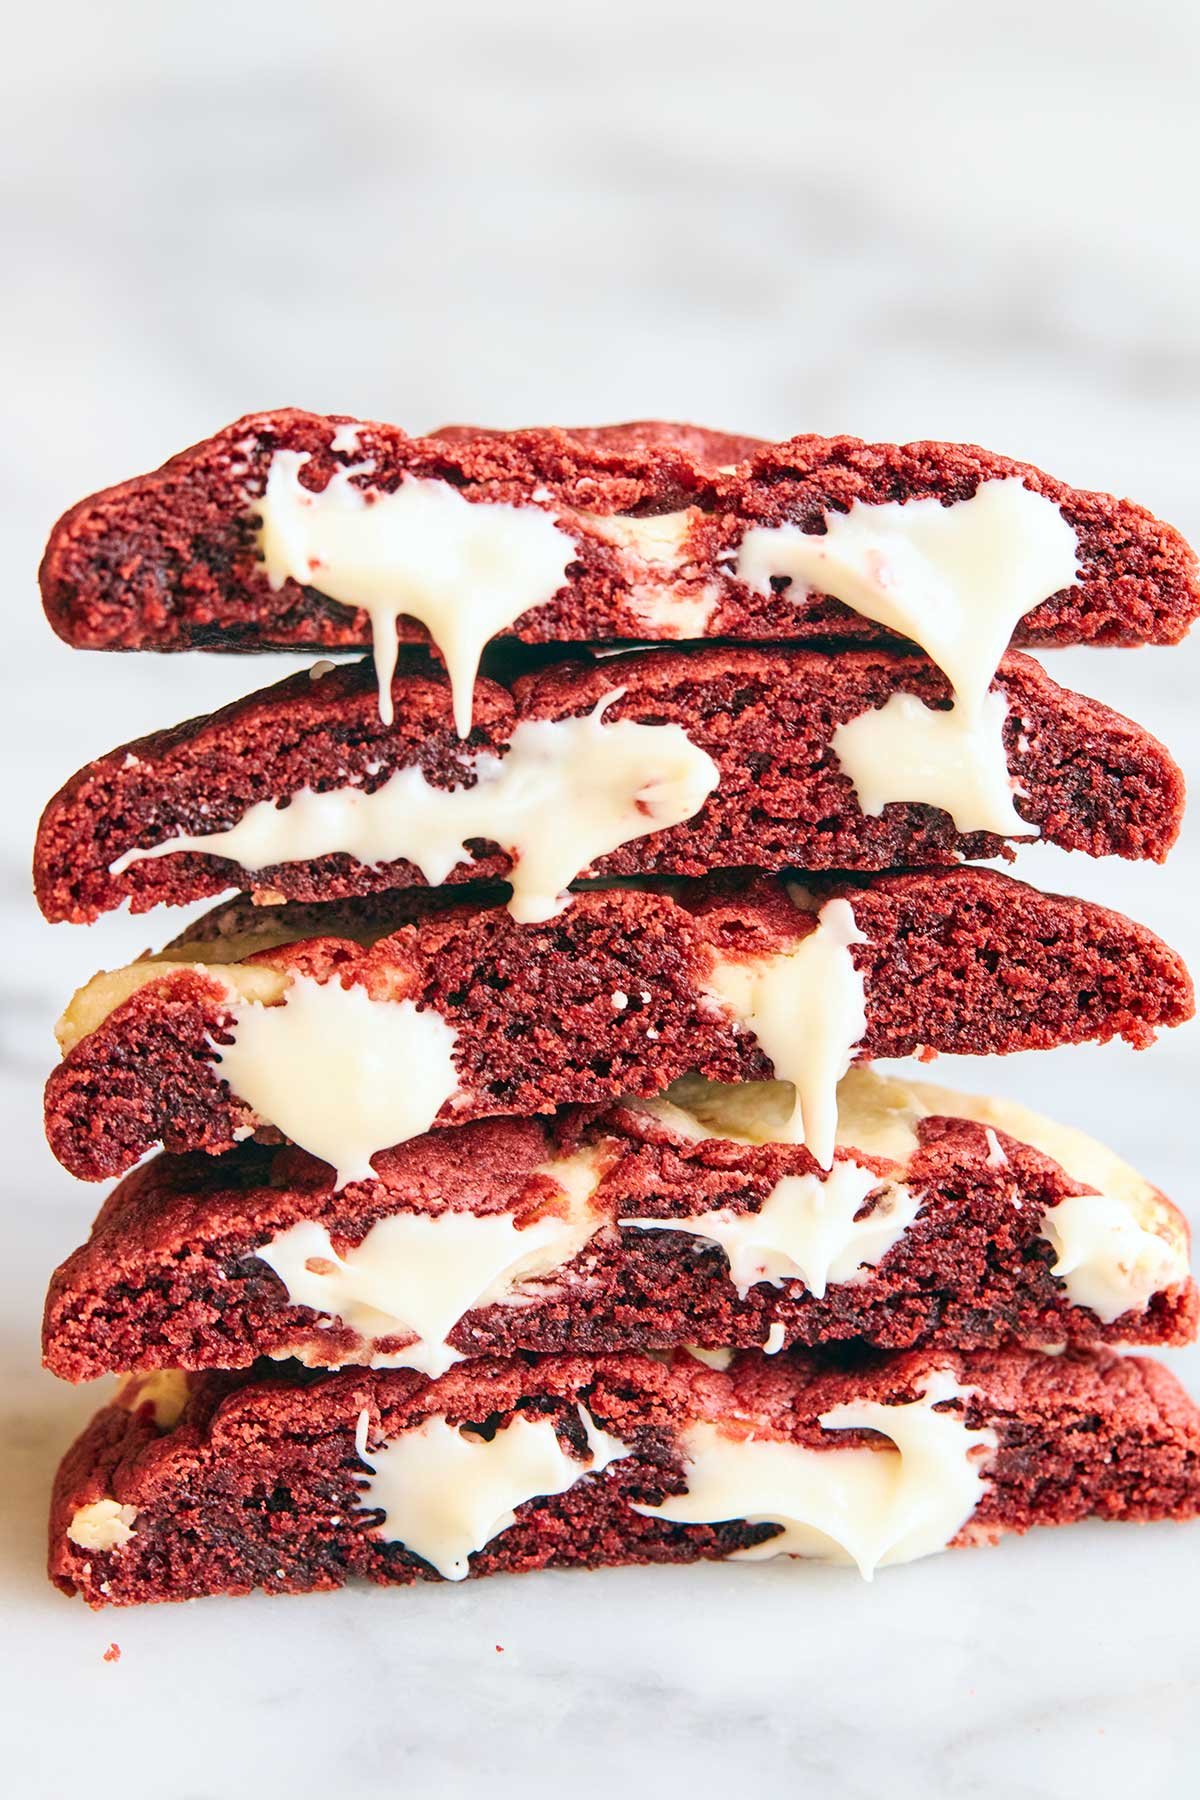
These Red Velvet Cookies are everything you love about a slice of classic red velvet cake packed into a classic, bakery-style cookie. They have slightly crispy, golden edges, a soft, fudgy center, and a gooey middle studded with melted white chocolate. The secret comes down to balancing sweet brown sugar, rich Dutch-process cocoa powder, and a splash of real buttermilk to bring that authentic, tangy flavor to life. You do not need any fancy ingredients to pull these off, just simple pantry staples and about fifteen minutes of prep time before chilling the dough. If you have been searching for a red velvet cookie recipe that delivers deep flavor alongside a melt-in-your-mouth texture rather than a dry, cakey mass, you are in the right place.
If you love classic cookies with that bakery-style texture, you might also enjoy my Bakery-Style Chocolate Chip Cookies.

Why You’ll Love This Cookies
Authentic Red Velvet Flavor: A generous splash of buttermilk pairs with Dutch-process cocoa powder to create that signature mild chocolate tang rather than just a basic sugar cookie dyed red.
Crisp Edges, Gooey Middle: The balance of granulated sugar and brown sugar helps the edges develop a delicate crispness while the middle stays soft.
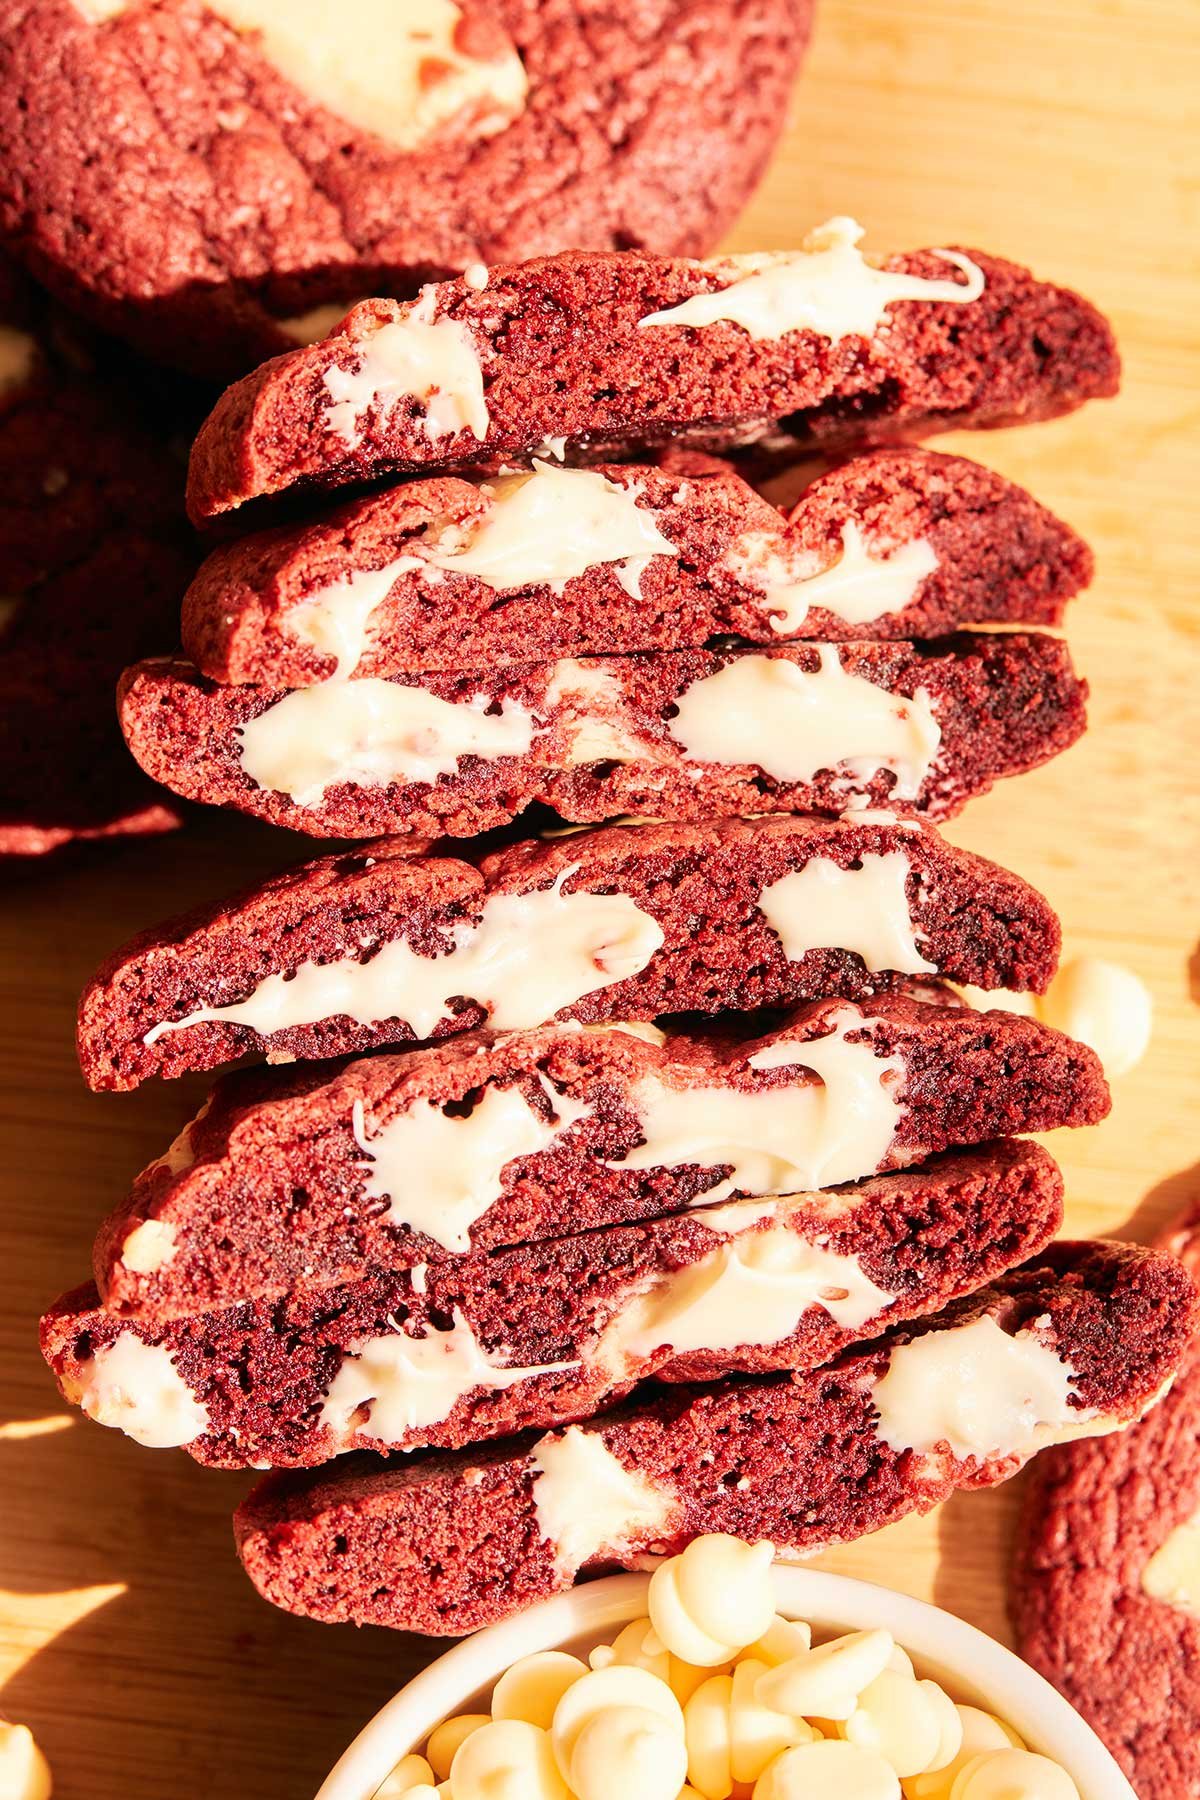
Melty White Chocolate: You’ll fall in love with Pockets of sweet, creamy white chocolate that balance the subtle bitterness of the cocoa powder in every bite.
Simple Pantry Ingredients & Easy method: Every single ingredient in this recipe is easy to find at your local grocery store, with no complicated prep required and the dough comes together in one bowl with a simple mixing method.
The Science of Soft, Fudgy Red Velvet Cookies
Dutch-Process Cocoa vs. Natural Cocoa: Dutch-process cocoa powder has been treated with an alkali to reduce its natural acidity. This creates a darker color, a smoother chocolate taste, and allows the red food coloring to pop without fighting against a harsh, acidic background.
The Molasses Moisture Magic Of Brown Sugar: Using a higher ratio of brown sugar to white granulated sugar introduces molasses to the dough. Molasses retains moisture during baking, which keeps the centers dense and fudgy texture we’re after.
The Buttermilk Advantage: Buttermilk provides the essential acid that gives red velvet its classic tangy notes. The acid also tenderizes the gluten proteins in the flour, resulting in an exceptionally soft crumb structure.
Baking Soda & Acid Interaction: Buttermilk is acidic, while baking soda (sodium bicarbonate) is alkaline. When acidic buttermilk meets alkaline baking soda, they produce carbon dioxide bubbles that lift the dough. This reaction, combined with buttermilk’s natural moisture and acidity, breaks down tough gluten strands, yielding a lighter, distinctly tender, and ultra-soft cookie.
Ingredients You’ll Need For Red Velvet Cookies
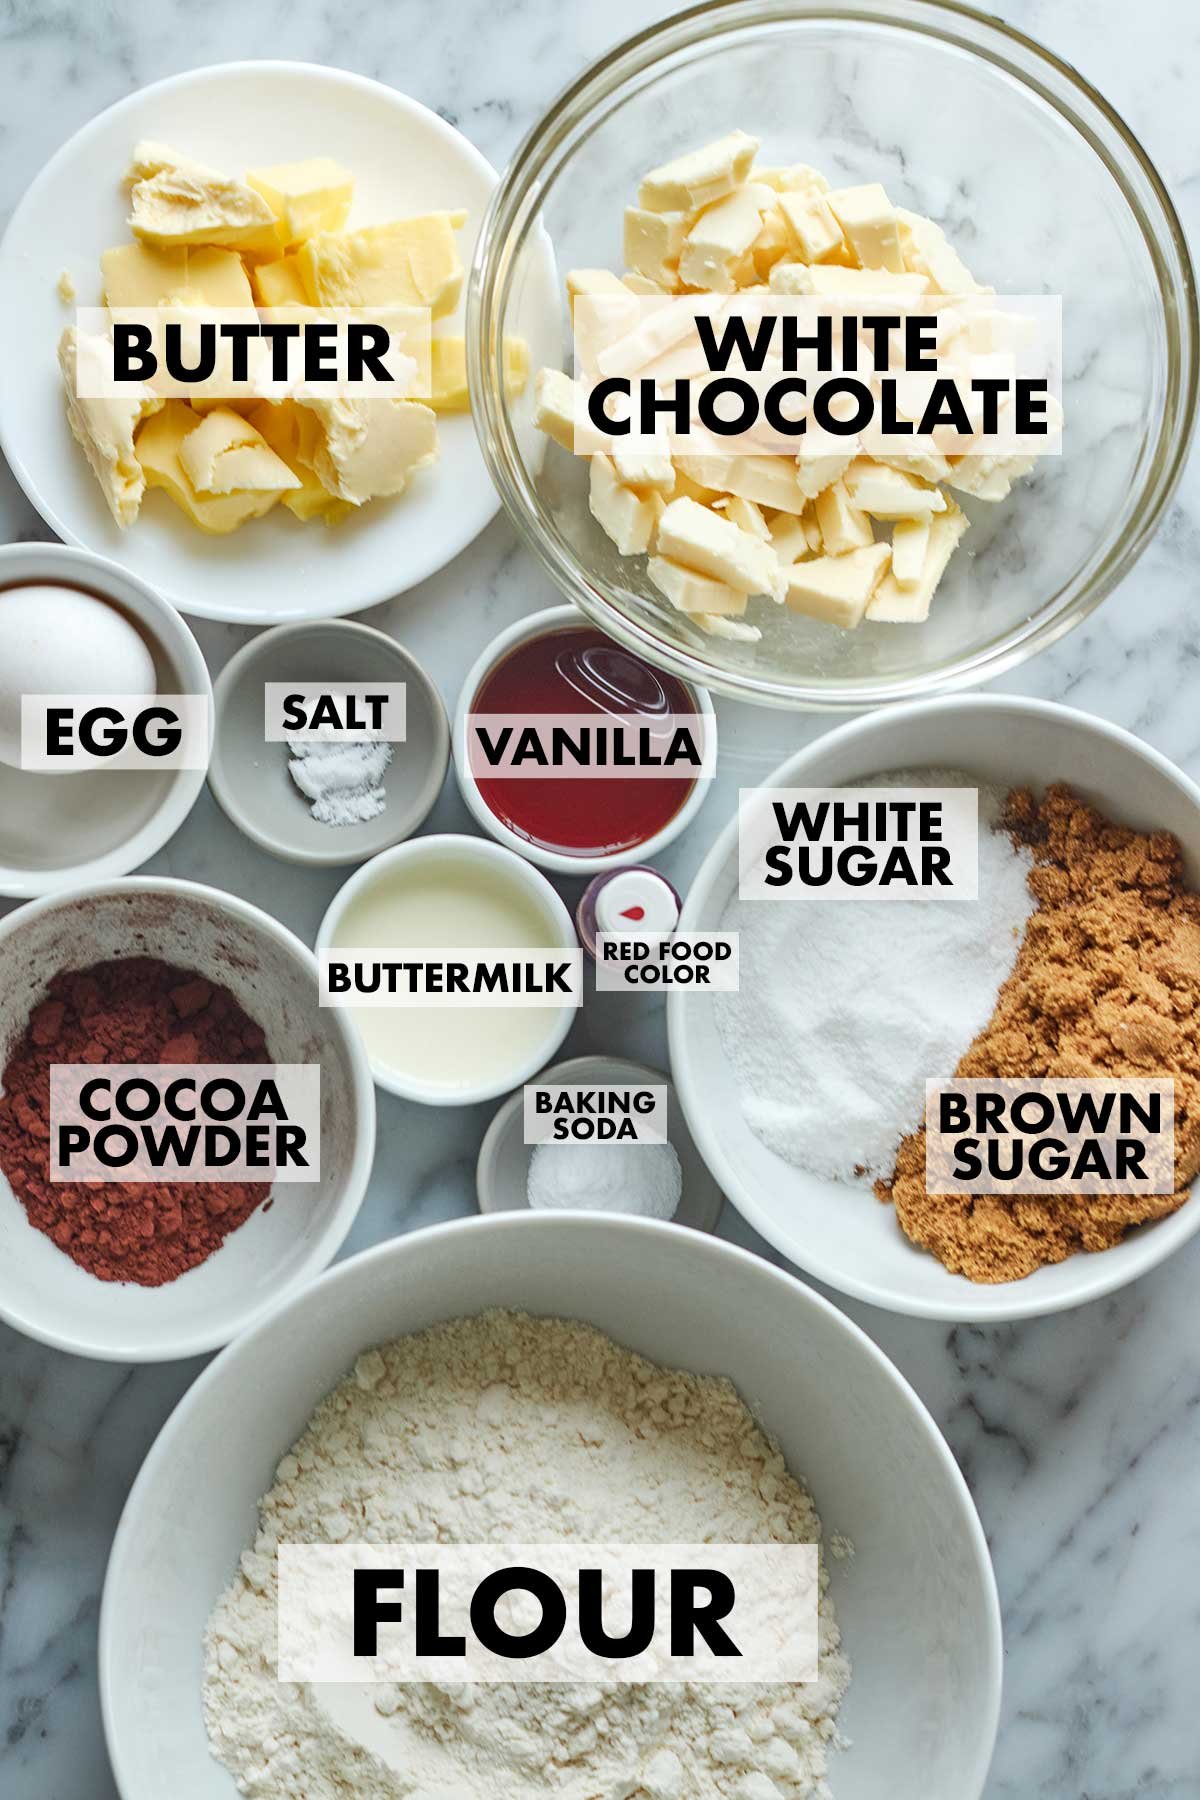
- All-Purpose Flour
- Baking Soda
- Salt
- Butter
- Brown Sugar & Granulated Sugar
- Egg
- Pure Vanilla Extract
- Red food color: Use a high-quality gel food coloring rather than liquid dye to achieve that rich, authentic red velvet hue.
- Buttermilk: For this recipe, I used store-bought buttermilk, but don’t worry if you don’t have any on hand. You can easily make a small batch of homemade buttermilk right in your kitchen using just a couple of simple ingredients. I’ll explain exactly how to make it in the next section.
- Dutch-Process Cocoa Powder: I didn’t use natural cocoa powder for these cookies. Instead, I chose a reddish-brown Dutch-process cocoa powder because I wanted just a subtle cocoa flavor without overpowering the classic red velvet taste. I also carefully used the right amount of cocoa powder so the cookies would have the right balance of chocolate flavor while still keeping that beautiful, vibrant red color we all love in red velvet cookies.
If you enjoy deep chocolate flavor in your bakes, you might also love my rich Double Chocolate Chip Cookies or these decadent Brown Butter Chocolate Chip Cookies.
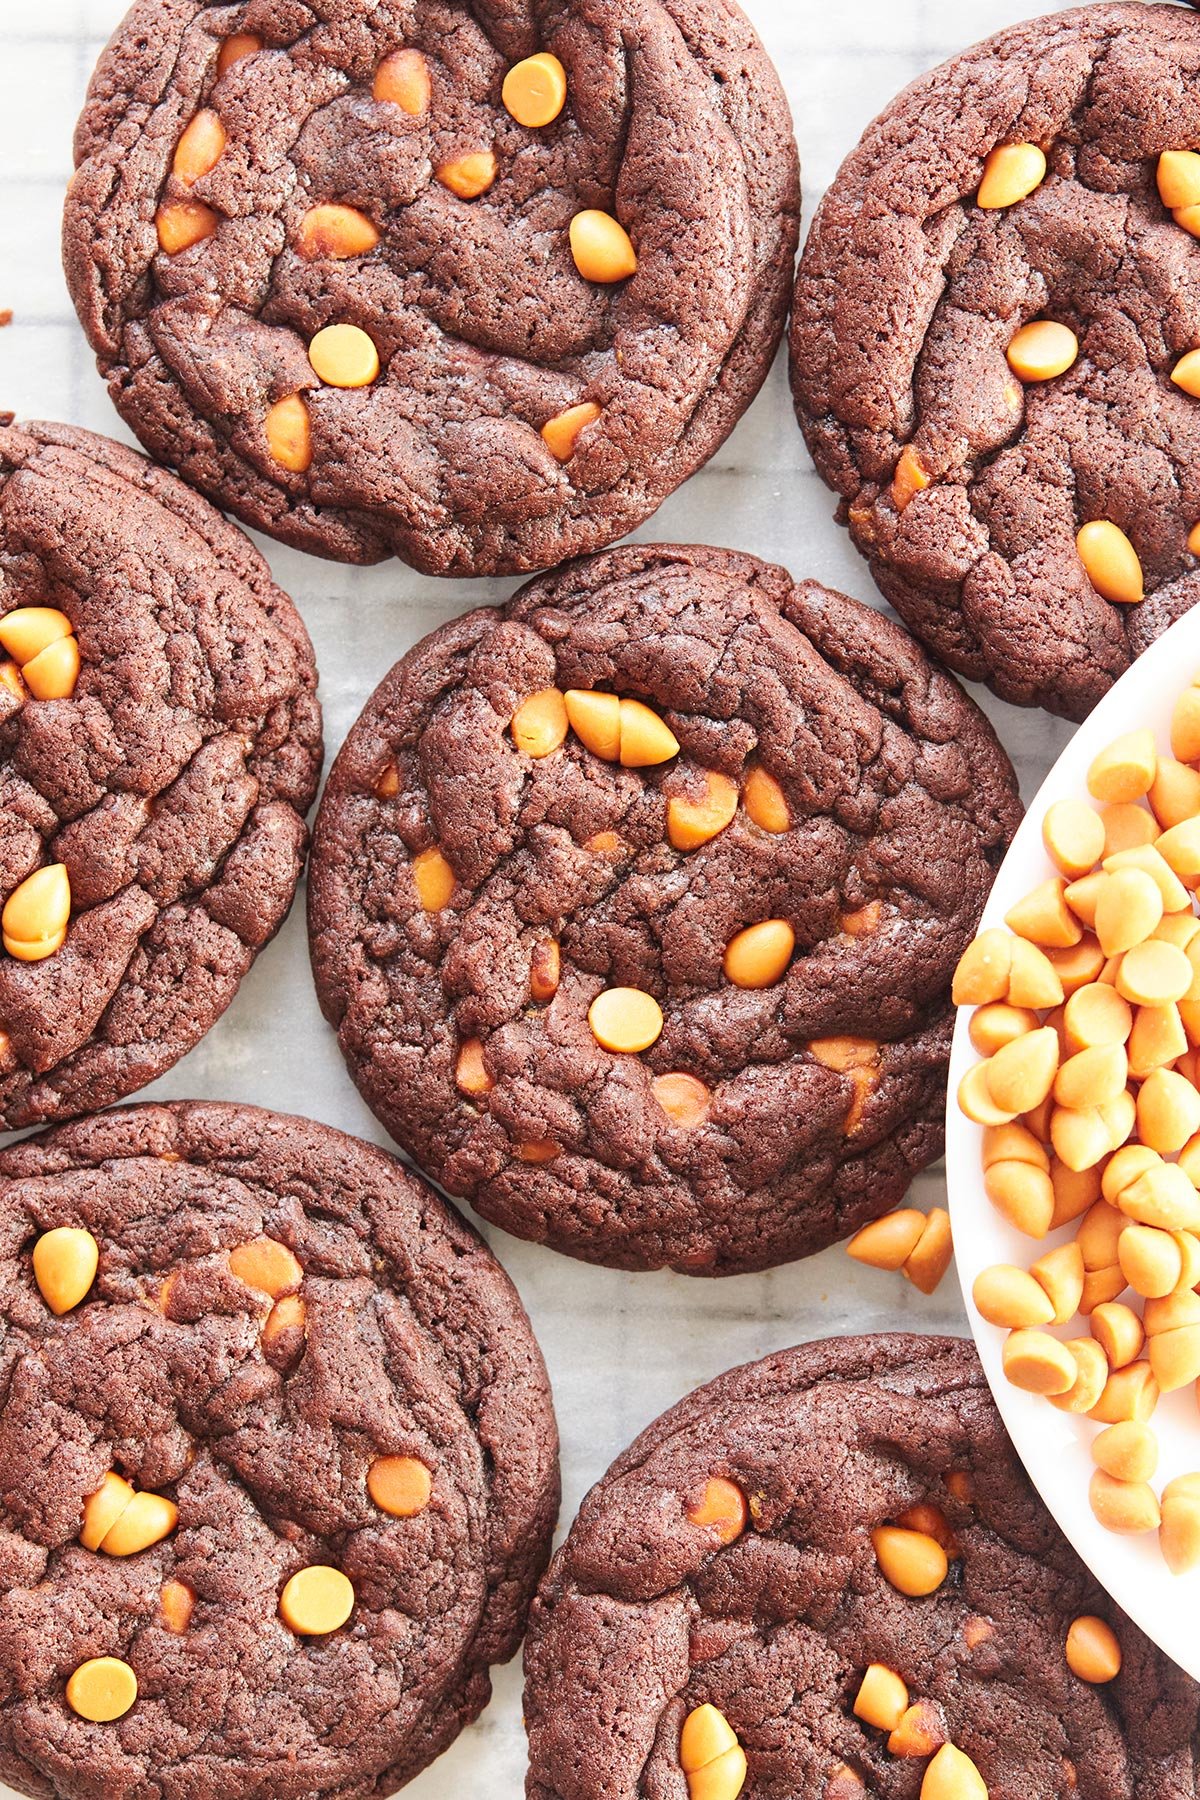
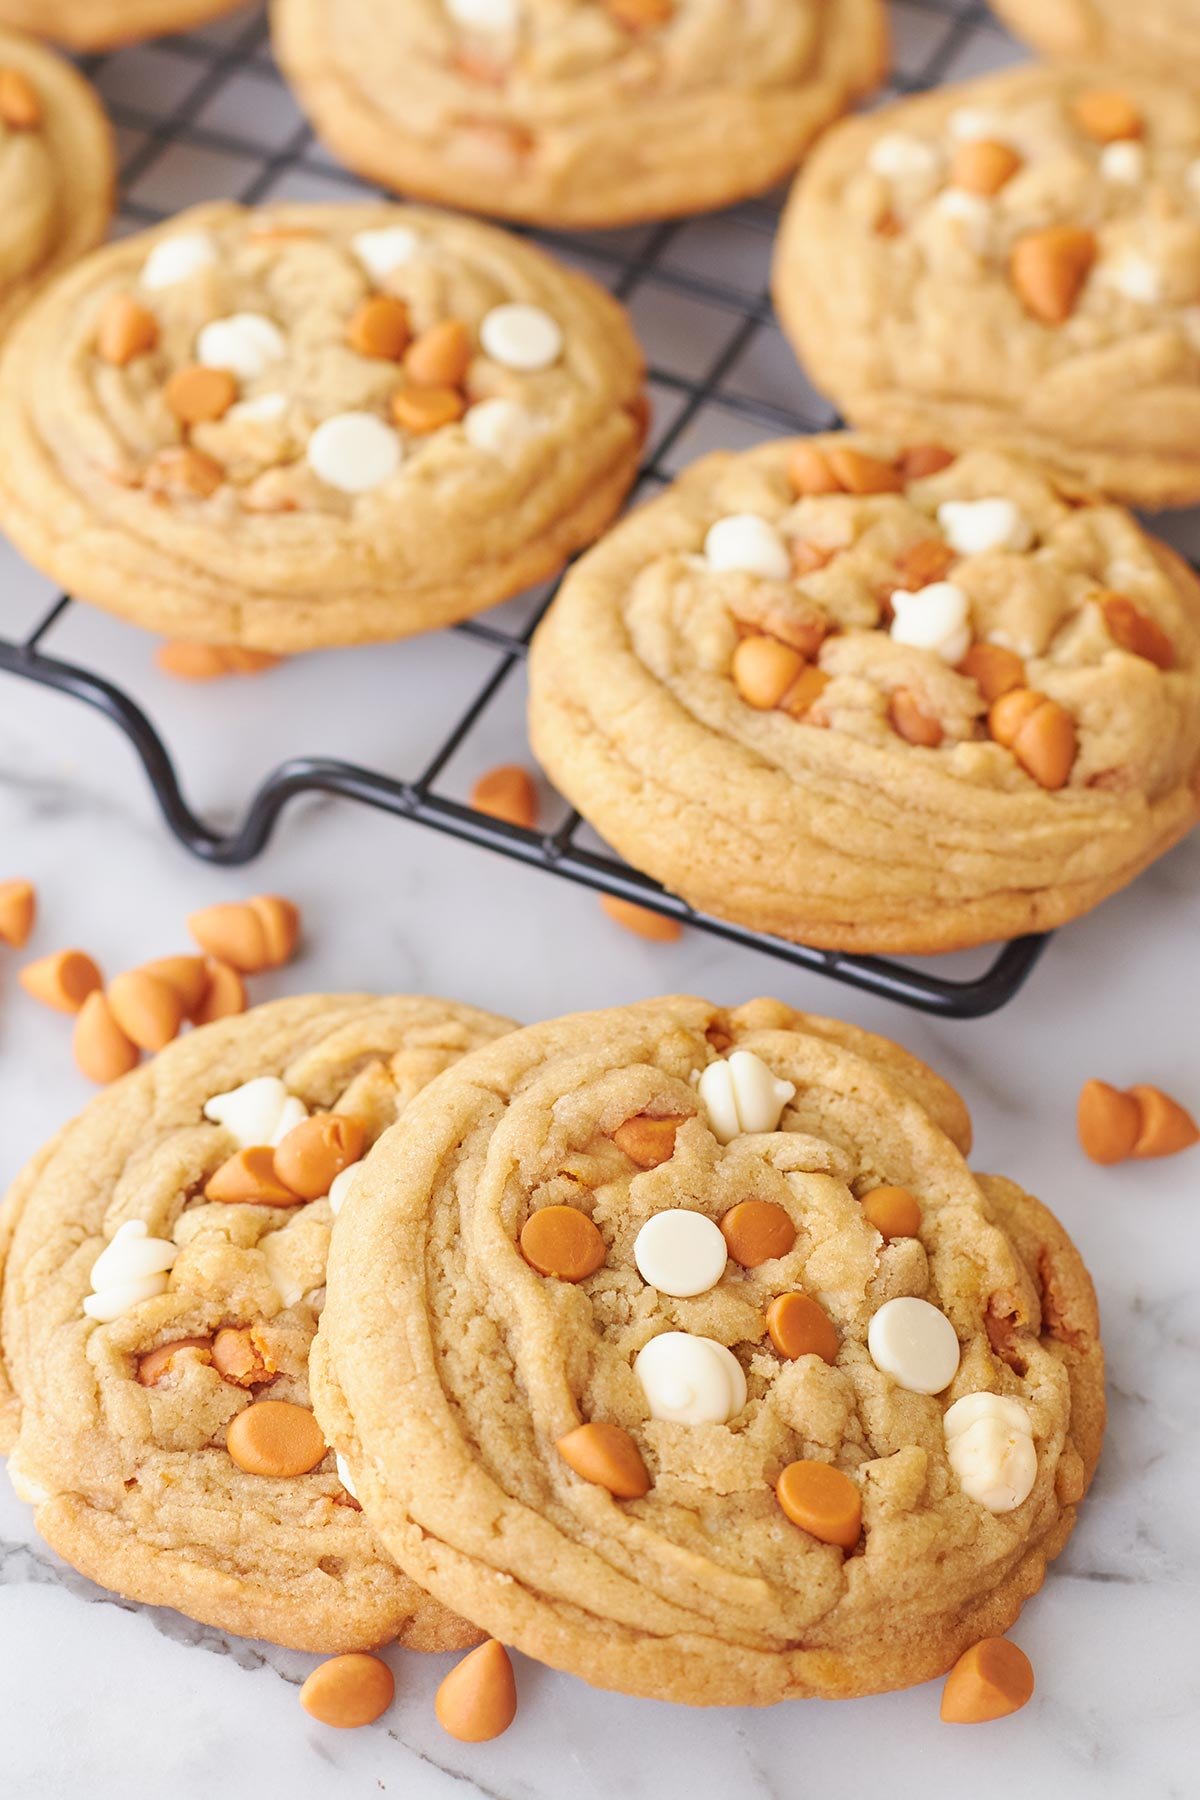
- Custom White Chocolate Bark (The Bakery Secret): Instead of using standard chocolate chips or chopped chocolate, we skip the usual store-bought morsels and make our own melted white chocolate bark. Melt a quality white chocolate bar, let it set into a slab, and then break it into irregular shards to fold into the dough. As the cookies bake, these broken bark pieces melt into gorgeous, uneven ribbons that spread effortlessly throughout the dough. Not only does this create those irresistibly gooey, melty pockets in every bite, but it also gives your cookies an effortlessly stunning, Instagram-worthy, bakery-style finish —much like the contrast in my Butterscotch White Chocolate Chips Cookies and festive White Chocolate Cranberry Cookies.
How To Easily Make Buttermilk at Home
If you do not have store-bought buttermilk on hand, you can easily make a quick substitute in just 5 minutes using simple pantry staples at home as I mentioned earlier. Here is the process: Simply mix 1 tablespoon of milk with ¼ teaspoon of lemon juice or white vinegar. Let it sit for 5–10 minutes, stir the mixture gently and let it sit undisturbed at room temperature for 5 to 10 minutes until it curdles slightly and thickens. This quick acid reaction mimics the tangy flavor and tenderizing power of traditional buttermilk, ensuring your red velvet cookies turn out exceptionally soft and fudgy every time.
How To Make Red Velvet Cookies
Step1: Make the White Chocolate Bark
Chop the white chocolate bar, or use any good-quality white chocolate, into small pieces. Place it in a microwave-safe bowl and microwave in 15–20 second intervals, stirring well between each interval, until smooth and completely melted.
Pour the melted chocolate onto a parchment-lined tray and spread it into an even, medium-thick (like ⅛–¼ inch (3–6 mm) thickness) layer, not too thin or too thick. Chill until completely firm, then break it into small, irregular pieces. Set aside until ready to use. These homemade white chocolate bark pieces create creamy, gooey pockets of chocolate throughout the cookies.
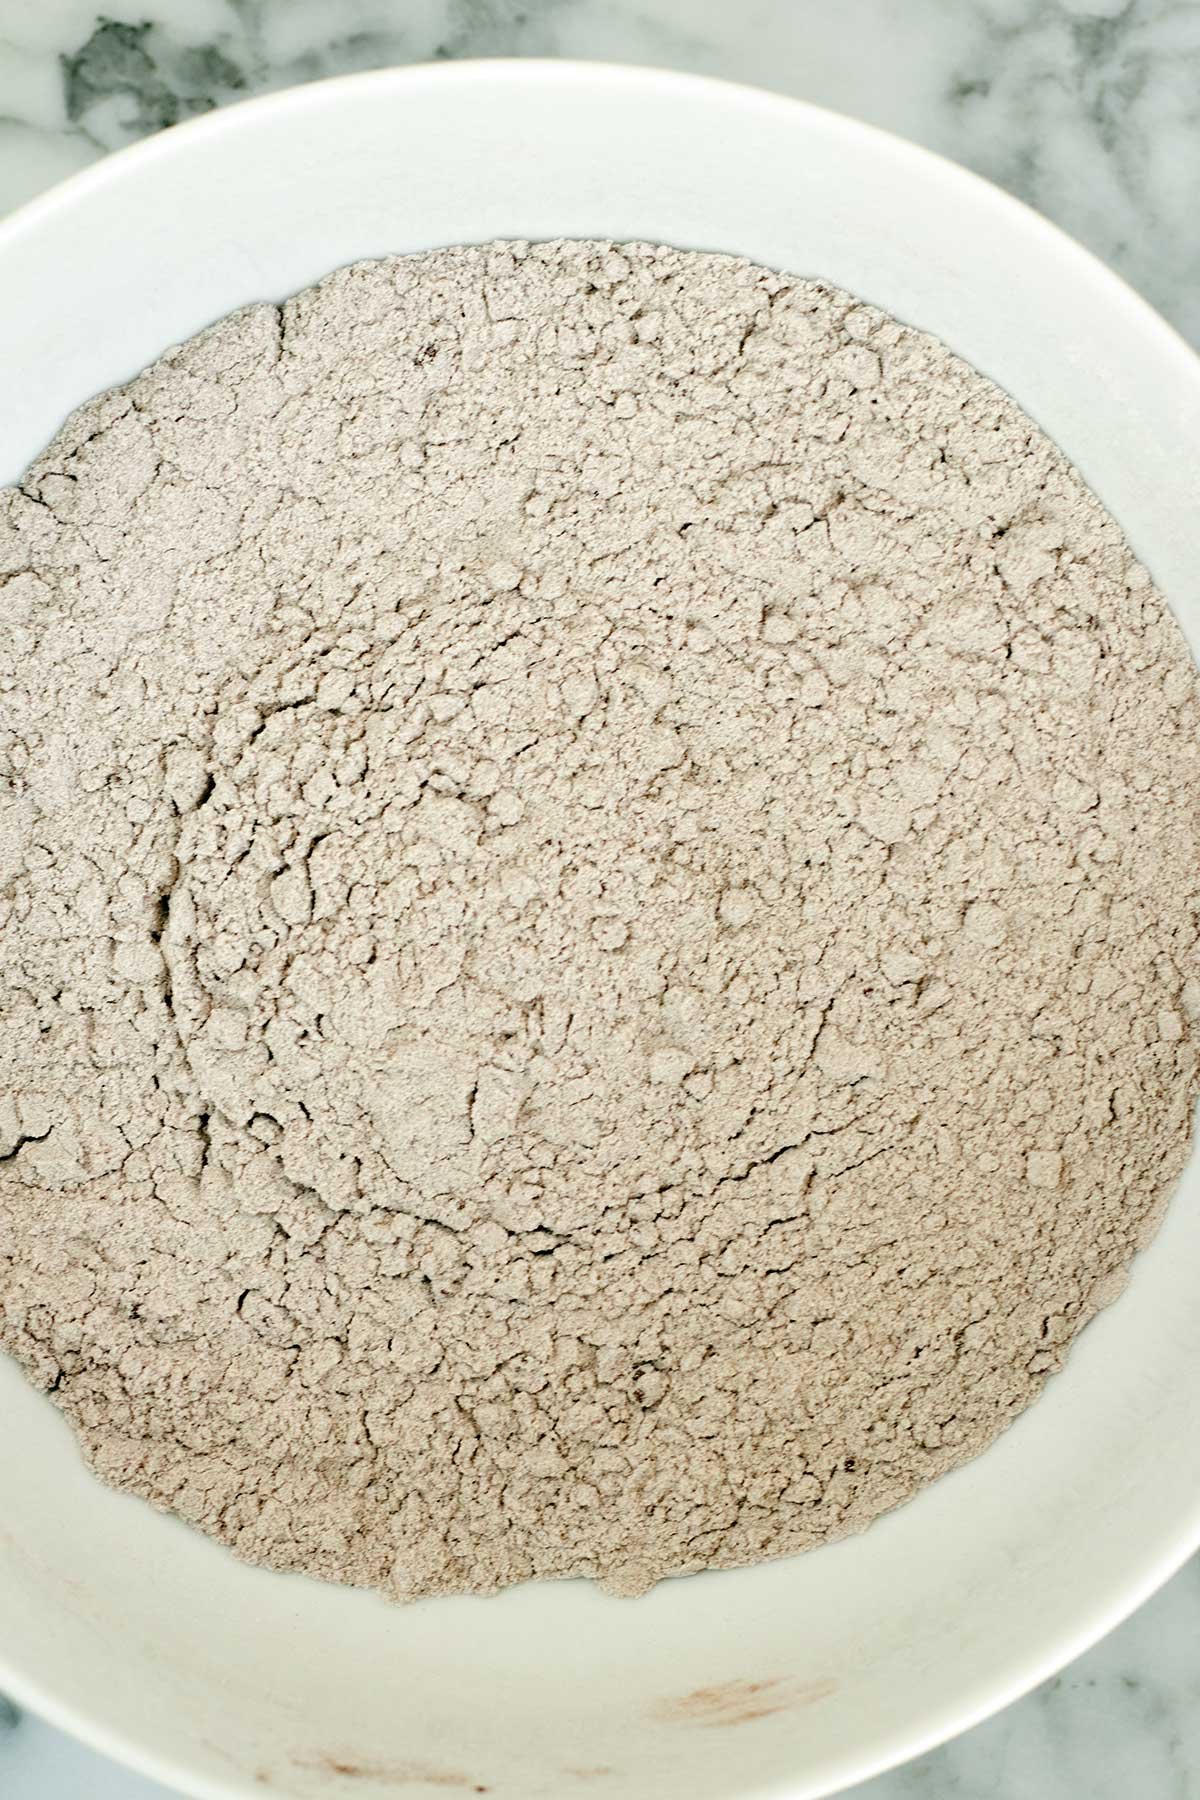
Step2: In a medium bowl, whisk together the flour, cocoa powder, baking soda, and salt until evenly combined. Set aside.
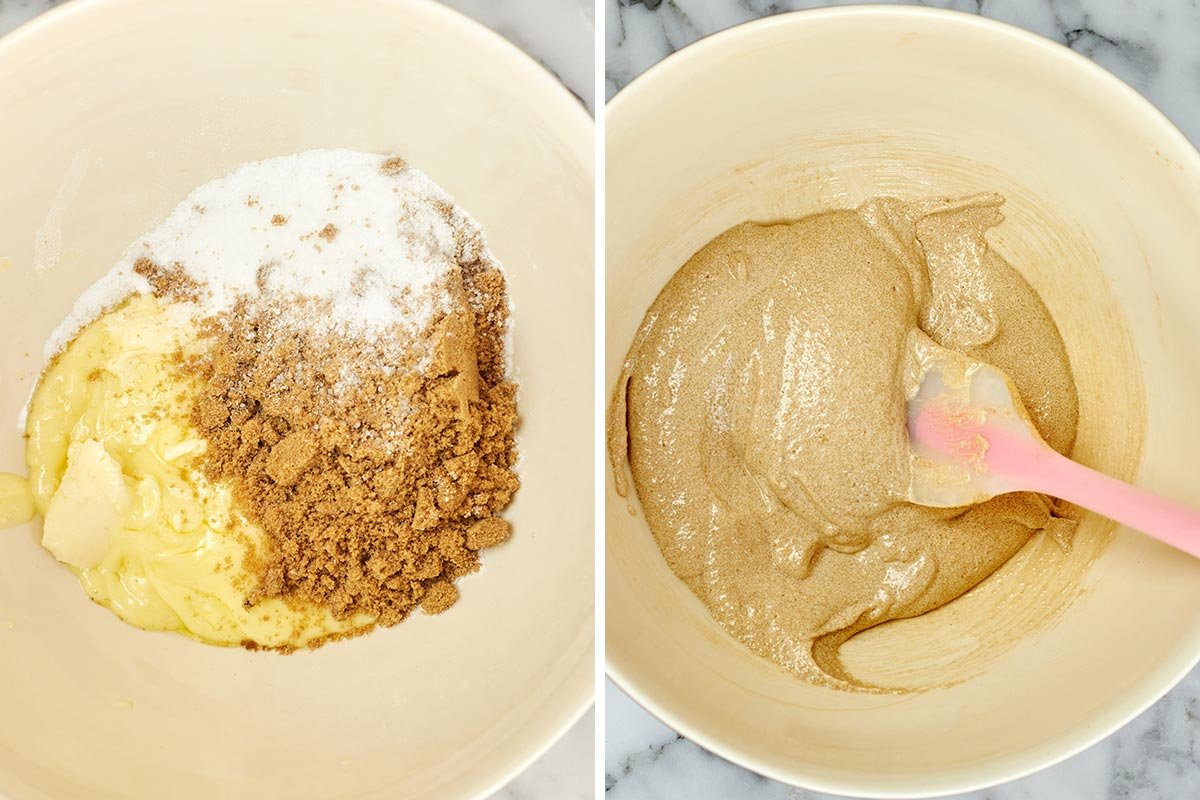
Step3: Beat the softened butter, brown sugar, and granulated sugar until light and creamy, about 2–3 minutes. Scrape down the bowl as needed.
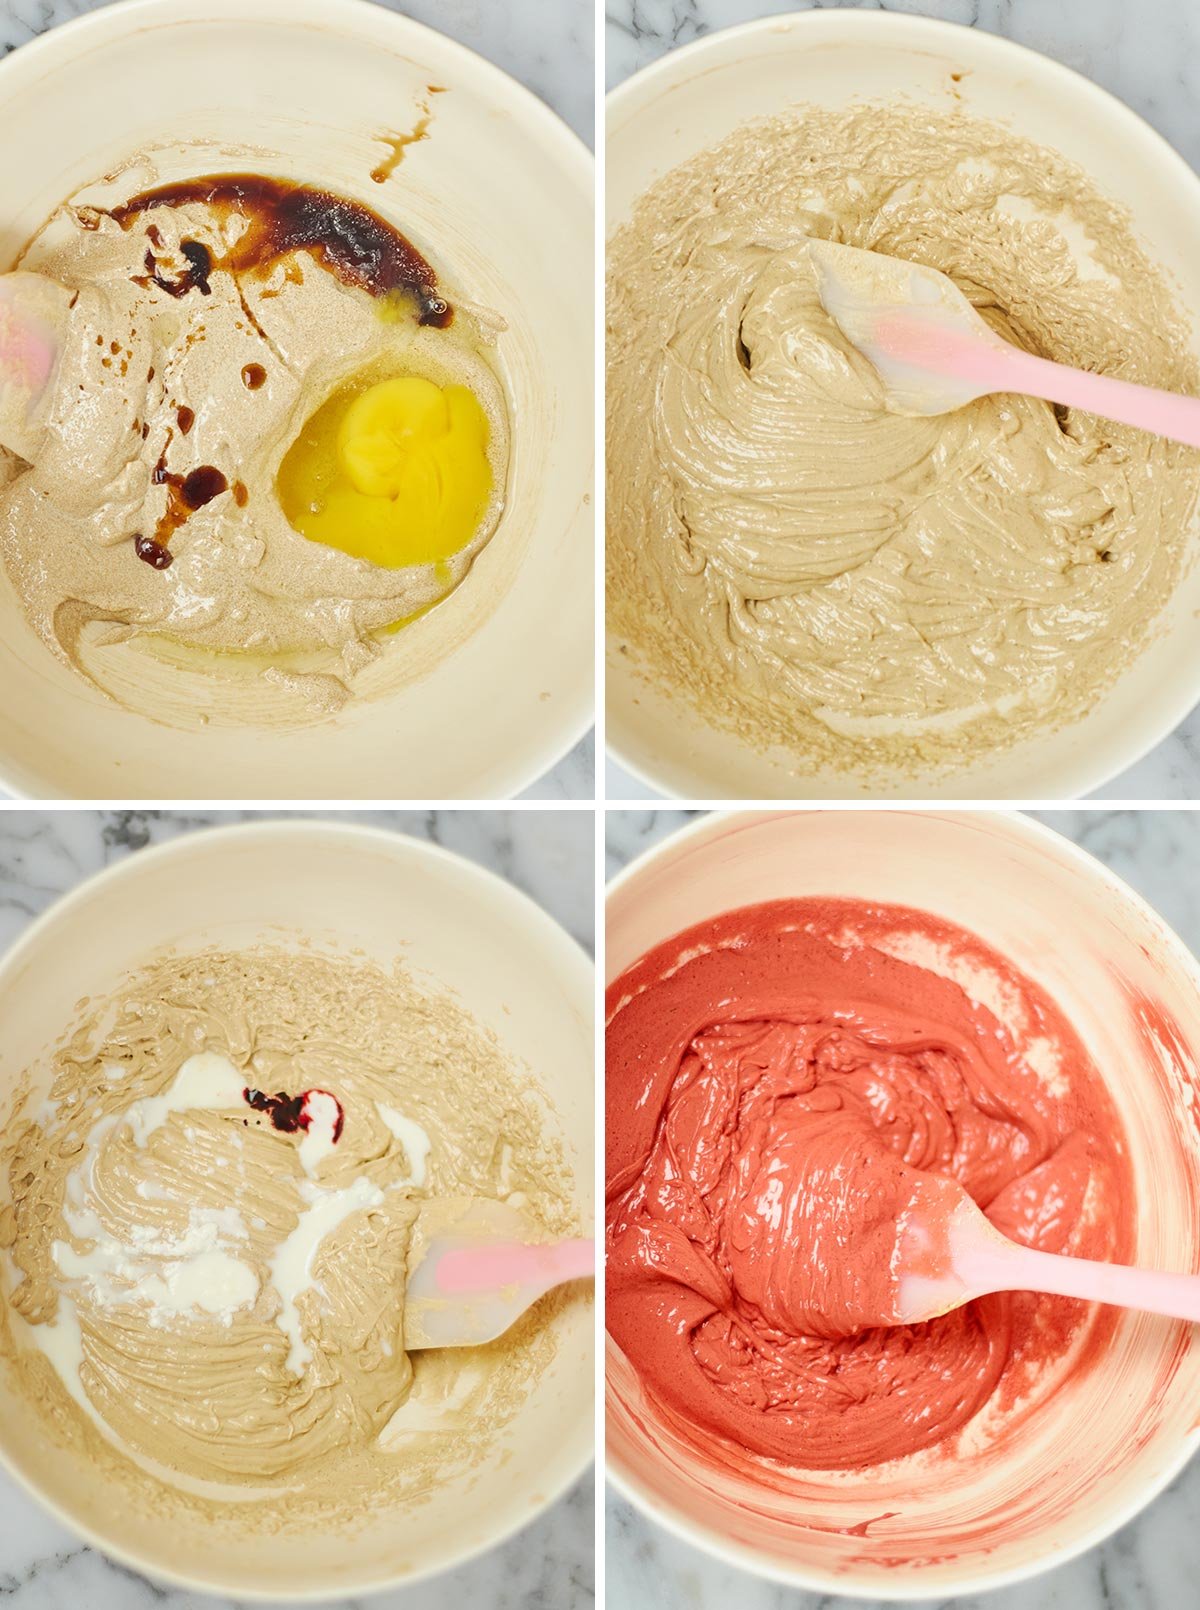
Step4: Add the egg, vanilla extract, red food coloring, and buttermilk to the creamed butter and sugar mixture. Beat on medium-low speed until everything is smooth and fully combined. Scrape down the sides of the bowl as needed to ensure the ingredients are evenly incorporated.
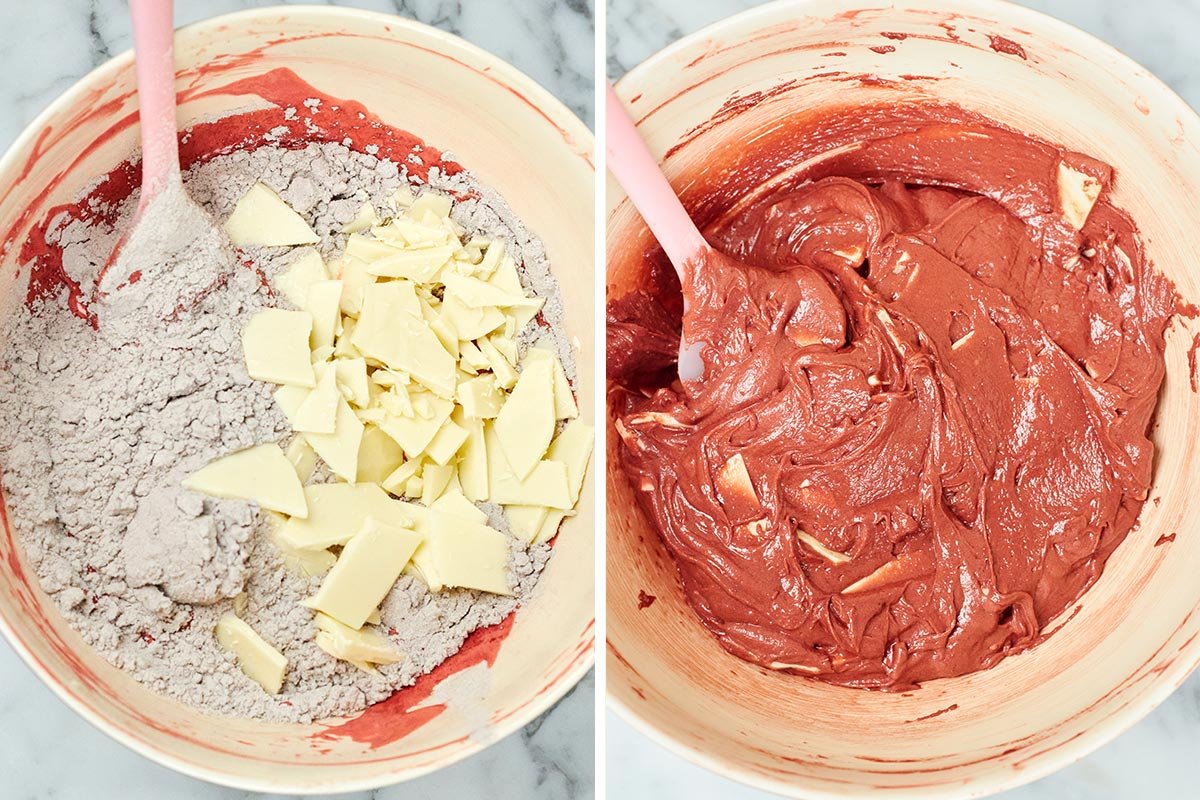
Step5: Gradually mix the dry ingredients into the wet mixture until just combined. Gently fold in the chopped white chocolate bark pieces until evenly distributed. The dough should be thick, soft, and slightly sticky. Cover the cookie dough tightly and refrigerate for at least 1 hour.
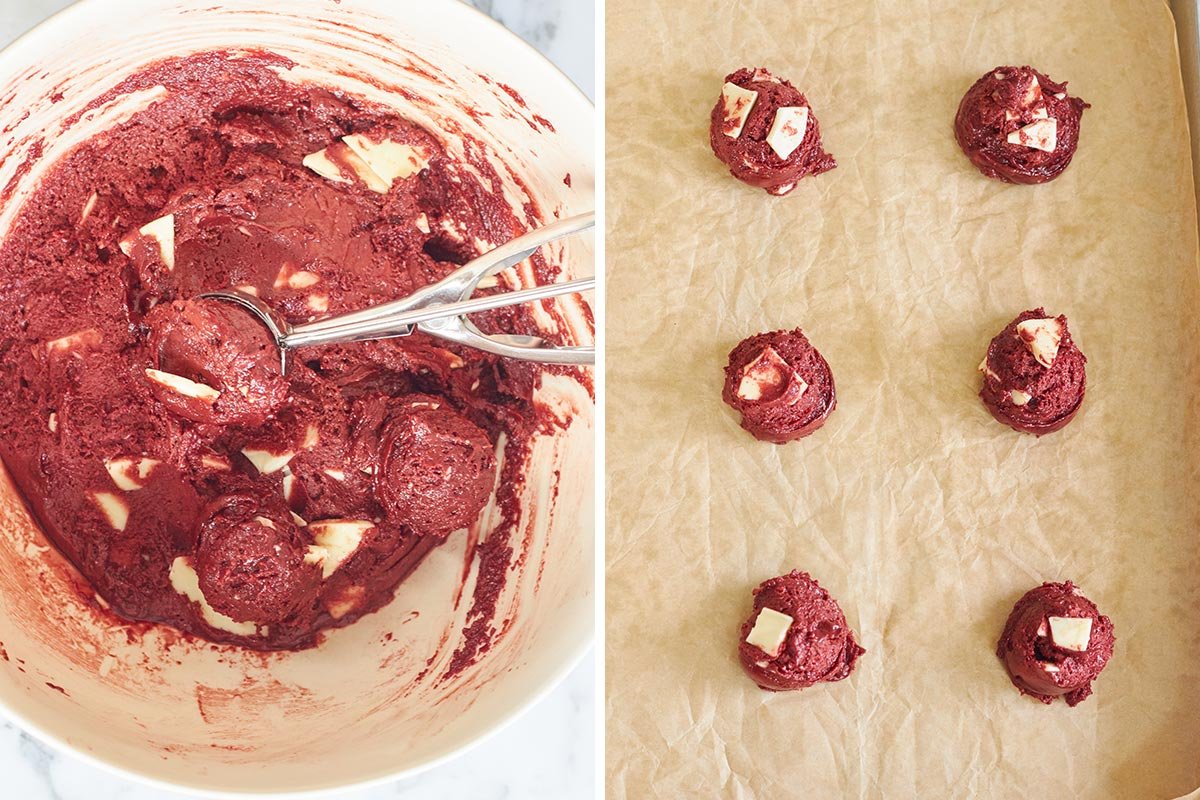
Step6: When ready to bake, use a medium scoop or (35g) portions of dough, roll into smooth balls, and place them on the prepared parchment-lined baking sheet, leaving space between each cookie for spreading.
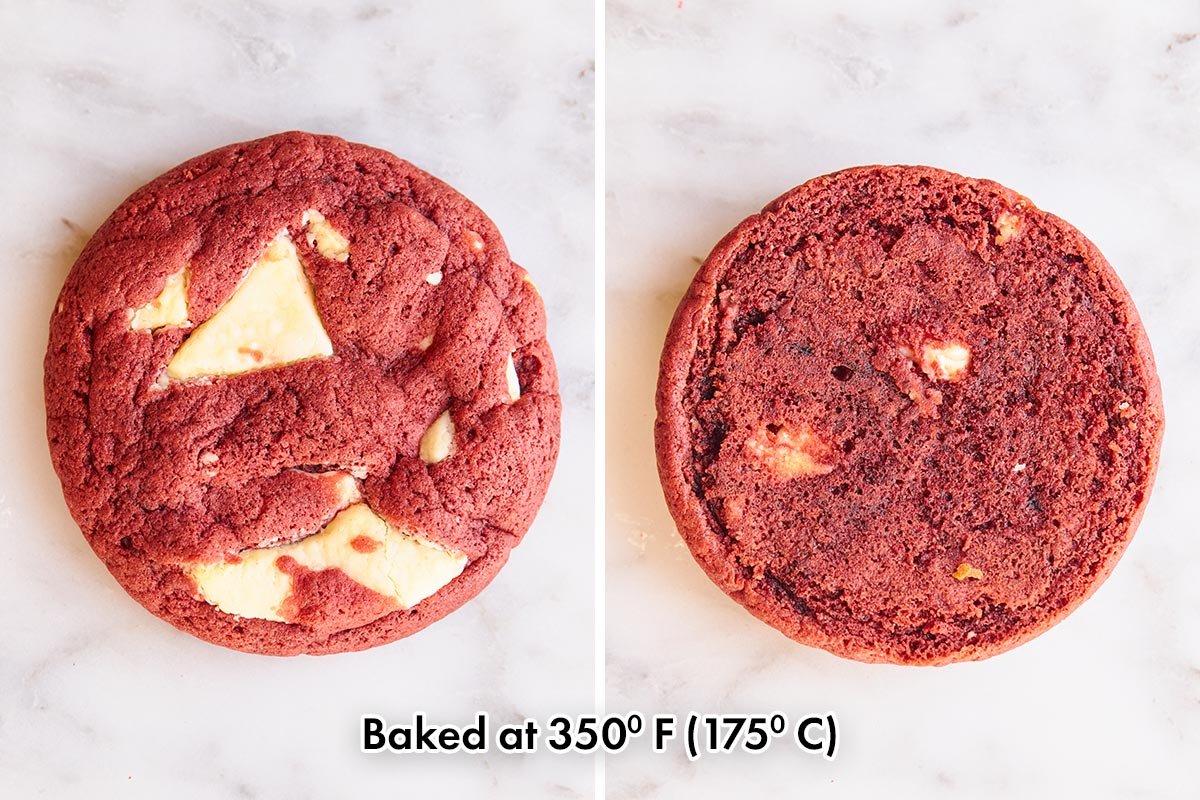
Step7: Bake the cookies in the preheated oven at 350°F (175°C) for 10–12 minutes, or until the edges are set while the centers still look slightly soft. Avoid overbaking. Let the cookies cool on the baking sheet for 5–6 minutes before carefully transferring them to a wire rack to cool completely.
Expert Tips for Perfect Red Velvet Cookies
Use Gel Coloring Over Liquid: Gel food coloring is my first choice because it’s concentrated and won’t add unnecessary liquid to the dough. High-quality gel food color provides a deep, classic red hue using only a small amount.
Do Not Skip the Chill Time: Chilling the dough even for a short time allows the flour to fully hydrate and solidifies the butter. Skipping this step leads to flat, thin cookies that spread too fast in the oven.
Measure Flour Accurately: I highly recommend using a kitchen scale or scoop your flour into the measuring cup with a spoon and level it off with a knife. Packed flour creates dense, dry cookies.
Don’t overbake: This is probably the most important tip for getting that fudgy center. Take the cookies out when the edges are set but the middle still looks soft.

Storage and Freezing Instruction
Room Temperature: Store completely cooled baked cookies in an airtight container at room temperature for up to 5 days.
Freezing Baked Cookies: Allow baked cookies to cool completely, then layer them between sheets of parchment paper in a freezer-safe container. Freeze for up to 3 months. Thaw at room temperature for 20 minutes before serving. For that freshly baked texture, warm an individual cookie in the microwave for about 10–15 seconds.
Freezing Cookie Dough: Scoop the dough into balls and place them on a baking sheet lined with parchment paper. Freeze for 1 hour until firm, then transfer the dough balls to a zip-top freezer bag for up to 3 months. Bake straight from frozen at 350°F (175°C), adding 1 to 2 extra minutes to the total baking time. (If you love having frozen cookie dough ready for quick cravings, check out my Small Batch Chocolate Chip Cookies too!)
Frequently Asked Questions
Yes, you can use natural cocoa powder instead of Dutch-process cocoa powder, but there is one important difference: their acidity affects how the cookie dough reacts with baking soda.
Dutch-process cocoa is neutralized and has a smoother, darker chocolate flavor.
Natural cocoa powder is more acidic and can react with baking soda, potentially causing a little more spread and a slightly different texture/color.
Cocoa naturally darkens the dough, and baking causes additional browning around the edges. The final color also depends heavily on the food coloring you’re using. A concentrated red gel color generally gives a stronger result than a liquid coloring. Try to use high-quality gel food color for that classic perfect Red Velvet Color.
Buttermilk contributes to both the flavor and the chemistry of the recipe, so I wouldn’t simply leave it out. If you don’t have store-bought buttermilk, you can make a small amount by mixing 1 tablespoon of milk with about ¼ teaspoon of lemon juice or white vinegar, then letting it stand for about 5–10 minutes.
More Cookie Recipes to Try
Twin Chocolate Chip Cookies
Butterscotch Chocolate Chip Cookies
Costco Chocolate Chip Cookies
Butterscotch Chocolate Chip Cookies
Butterscotch Chip Cookies

Red Velvet Cookies
Equipment
- Kitchen measuring scale/cups
- Baking sheets or parchment sheets
- Mixing bowls
- Whisk
- Spatula
- Strainer
- Medium cookie scoop
- Wire cooling rack
Ingredients
- 1 ½ cups (190g) all-purpose flour
- 3 tablespoon (15g) cocoa powder
- ½ teaspoon baking soda
- ¼ teaspoon salt
- ½ cup (113g) unsalted butter, softened
- ½ cup (100g) packed brown sugar
- ⅓ cup (60g) granulated sugar
- 1 large egg
- 1 teaspoon vanilla extract
- ¼ teaspoon red gel food coloring
- 1 tablespoon buttermilk
- ¾ cup (150g) crashed white chocolate bark (Extra for topping)
Instructions
- Make the White Chocolate Bark. Chop the white chocolate bar, or use any good-quality white chocolate, into small pieces. Place it in a microwave-safe bowl and microwave in 15–20 second intervals, stirring well between each interval, until smooth and completely melted.Pour the melted chocolate onto a parchment-lined tray and spread it into an even, medium-thick layer. Avoid making the layer too thin or too thick, you want it just thick enough to break into pieces easily.Chill the chocolate until it is completely set and firm. Once hardened, break the chocolate into small, irregular pieces. Set them aside until you're ready to add them to the cookie dough. These homemade white chocolate bark pieces melt beautifully as the cookies bake, creating delicious pockets of creamy white chocolate throughout every bite.
- Whisk the Dry Ingredients. In a medium bowl, whisk together the flour, cocoa powder, baking soda, and salt until evenly combined. This helps distribute the leavening and cocoa powder throughout the flour, ensuring a consistent texture and flavor in every cookie. Set the dry ingredients aside.
- Cream the Butter and Sugar. In a large mixing bowl, beat the softened butter, brown sugar, and granulated sugar together until light, creamy, and well combined, about 2–3 minutes. Scrape down the sides of the bowl as needed to make sure everything is evenly incorporated. Once the butter and sugars are light and creamy, add the egg, vanilla extract, buttermilk, and red food coloring. First add egg and vanilla then beat until fully incorporated. Next, red food coloring and buttermilk, gradually mixing on low speed just until combined. Don't worry if the mixture looks slightly curdled at this stage, that is normal and will come together once the dry ingredients are added.
- Add the Dry Ingredients and White Chocolate bark. Gradually add the prepared dry ingredients to the wet mixture, mixing on low speed. Mix only until the flour is just incorporated. Avoid overmixing, as this can develop too much gluten and result in a tougher cookie. Once the dough comes together, gently fold in the chopped white chocolate bark pieces using a spatula. Fold just until the chocolate is evenly distributed throughout the dough. Cover the bowl tightly with plastic wrap and refrigerate the cookie dough for about 1 hour.
- Preheat the Oven and Prepare the Baking Sheet. Preheat your oven to 350°F (175°C). Line a baking sheet with parchment paper and set it aside. Using parchment paper helps prevent the cookies from sticking and promotes more even browning on the bottom.
- Scoop the Cookie Dough. When ready to bake, scoop the cookie dough using a medium cookie scoop, about (35g) of dough per cookie and roll into smooth balls. Place the dough balls onto the prepared parchment-lined baking sheet, leaving enough space between them for the cookies to spread evenly while baking.
- Bake and Cool. Bake the cookies in the preheated oven for 10–12 minutes, or until the edges are set while the centers still look slightly soft. Avoid overbaking, the cookies will continue to firm up as they cool, helping you achieve soft, fudgy centers with lightly crisp edges. Let the cookies cool on the baking sheet for 5–6 minutes before carefully transferring them to a wire rack to cool completely.